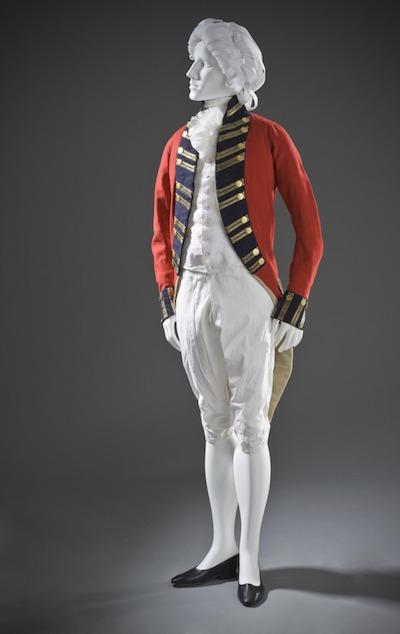
Have you ever pulled your favorite wool coat out of the closet, only to find that some hungry moths had been busily at work during the summer? Given that today is Christmas, and surely the weather is chilly (in other parts of the country, at least), you may have encountered this problem as you’re searching for warm sweaters. And believe it or not, many of the woolen textile objects in LACMA’s collection have suffered the same fate at some point in their history. In fact, there is one such object currently residing in the textile conservation lab: a bright-red military uniform coat from England.
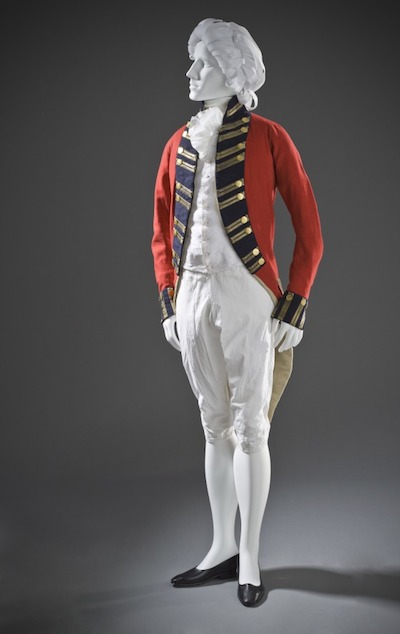 England, Man’s Military Uniform Coat, 1799–1800, purchased with funds provided by Michael and Ellen Michelson
This handsome coat has suffered insect damage in the form of scattered holes and grazing.
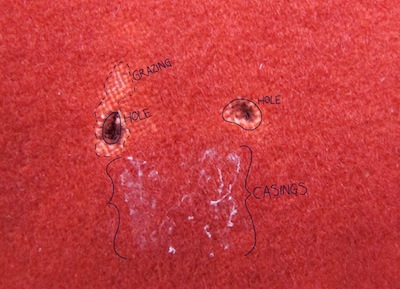
Above: Moth larvae damage woolen objects via two main modes of action: 1) by “grazing” across the fluffy top layer of fibers (which often results in a color shift when the underlying fabric is exposed), 2), by concentrating in a single location, which results in a hole as they chew down through the entire depth of the fabric. As the larvae eat, they extrude a casing, which often can be found stuck to the textile near damaged areas. As a textile conservator, it is my job to stabilize these areas of damage structurally, while also visually compensating for the losses. Recently, the fiber-arts technique of needle felting has been adapted into the conservator’s repertoire, as a way to achieve both of these objectives simultaneously.

Above: The working set up: to the left are coils of wool roving, which are unspun wool fibers that have been dyed red. By blending the two shades of red, an exact match to the coat can be found. On the right are samples of red wool fabric. This is the substrate onto which the wool plug is felted: the fabric is attached on the inside of the coat and holds the fill in place while simultaneously providing support by spanning the damaged areas. In front is a block of gray foam: this is the working surface onto which the felting is performed using barbed needles, below (two can be seen stuck into the foam block).
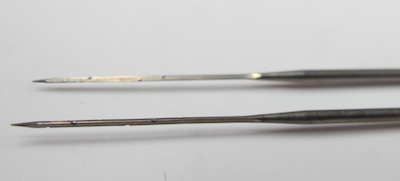
Close-up view of the barbed needles—along the tips you can see a series of small upward- facing notches: these grab the fibers and facilitate felting as the needles are moved up and down. Using sharp, barbed needles and wool roving (unspun wool fibers) in the same red as the jacket, I was able to create small felted woolen plugs, each one tailored to fit the exact shape of every hole. https://vimeo.com/82424253 The video above shows felting in action. By repeatedly piercing the fibers with a barbed needle, they enmesh and become entangled, eventually forming a dense felt. The felting is performed onto a fabric substrate, which supports the plug and provides structural support when attached to the inside of the garment. By trimming along the top surface of each plug with a pair of small scissors, any loose fibers are leveled off, allowing the texture of the plug to more closely mimic the dense texture of the fulled wool. This technique offers many advantages. For one, the fills are reversible and can be easily removed (this is an important tenet of conservation, and allows one to distinguish between the original materials and the work of the conservator). For another, it allows structural support and visual compensation to be achieved at the same time. Needle felting is both satisfying and successful: by imitating the color, texture, and depth of the surrounding fabric, the hole becomes essentially invisible to the naked eye.
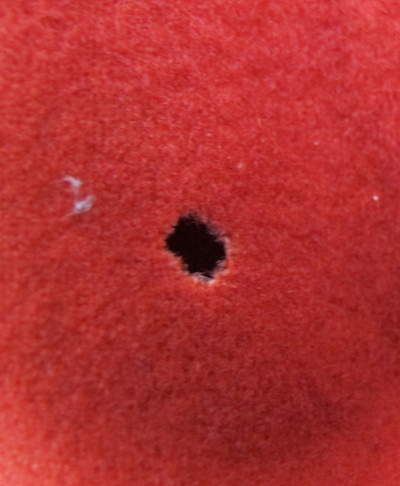
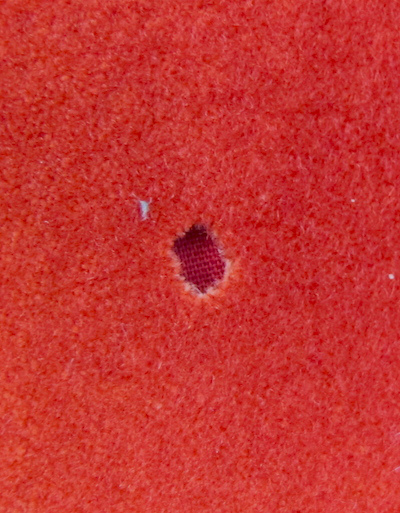
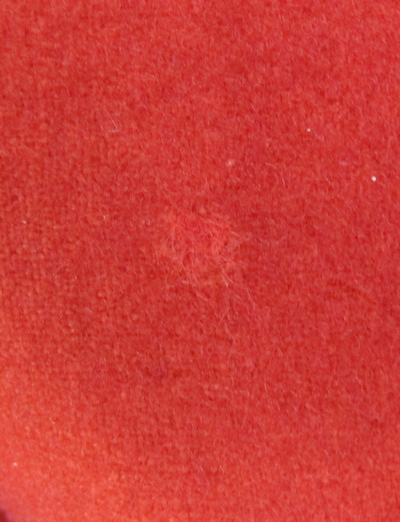
Above, top to bottom: 1) an area of loss; 2) visual compensation using a similarly colored fabric underlay—note the depth of the hole is still visible; 3) the same area of loss filled with a felted plug—note that the plug is able to match the color, depth, and texture of the loss to blend almost invisibly into the surrounding fabric.
You will be able to see the finished product in person when this jacket goes on display for an exciting exhibition about men’s fashion!
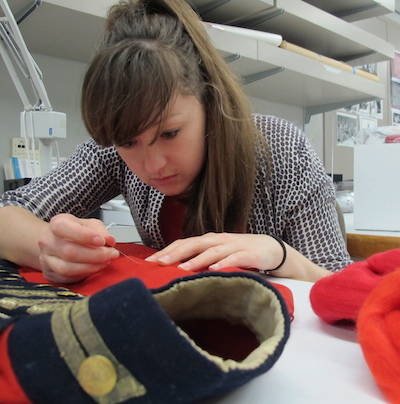
Above: Here I am, maneuvering the fiber fill into position. One hole down, just a few more to go!


