The LACMA team is working together from our respective homes to bring you interesting content and creative activities while the museum is temporarily closed to the public. We may not be able to gather together, but we can still create something beautiful.
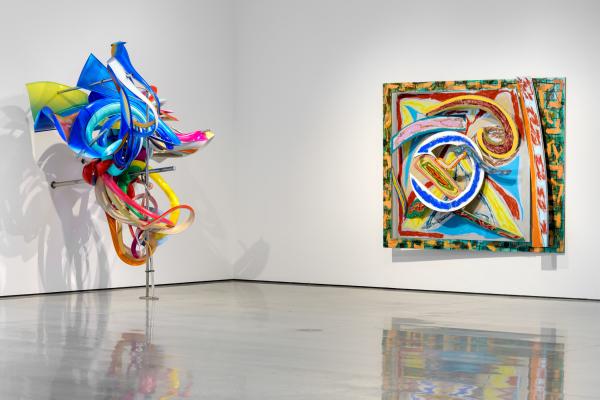
While we are safe at home practicing social distancing, let’s put on our creative hats and have a blast learning how to transform ordinary paper into a work of art using materials that we find around the house! Drawing inspiration from the sculptural monumental pieces of the American artist Frank Stella, you will learn how to bend, twist, and transform two-dimensional shapes into a masterful three-dimensional composition.
As I observe Frank Stella’s piece K56 (large version) in detail (above, left), I see an assortment of abstract shapes and colors in a lively community of interlocking twists and turns. I like to describe this piece to my friends as, “a colorful, playful tree that dances in a rainbow pool!”
Find an art mate and look at this work together.
- How would each of you describe this piece to someone in your house?
- Are there any shapes that are similar to ones in or around your house?
- Are there colors in the sculpture that you like to use in your own art?
- If you could give this work your own title, what would it be?
Hands-on Activity: Create Your Own Paper Sculpture!
Materials that you will need for this lesson:
- Thin sheets of cardboard—can be from a cereal, an oatmeal, or a Kleenex box, or other packages
- Paper in assorted colors—this project works best with paper that is slightly thicker than copy paper or paper you use at school to write on. Papers you can use include: construction paper, card stock, magazines, old coloring sheets, and junk mail (optional: patterned paper)
- Adhesives—Glue sticks, transparent or colored tape
- Tools for making marks or drawings—pencils, markers
- Tool for measuring and cutting—ruler, scissors
- Optional fun items—decorative elements like glitter glue, or gold/silver markers, string/yarn
Step 1
Begin by laying all the materials on a table.
Step 2
If you would like to use patterned paper, but do not have any, don’t worry! Experiment by making your own from images in magazines, or drawing and coloring designs on white paper.
Step 3
Select 6–8 types of paper and draw geometric shapes (made out of points and lines—like triangles, cubes, etc.) or abstract/organic shapes (natural forms that are irregular—like leaves, flowers, etc.) in different sizes and cut them out.
Tip: if your paper is too thin, or bends easily while holding it, fold the page in half before you cut, then trace a shape, and proceed to cut the shape making sure you have two pieces. Glue them together to create a sturdier shape to work with.
Step 4
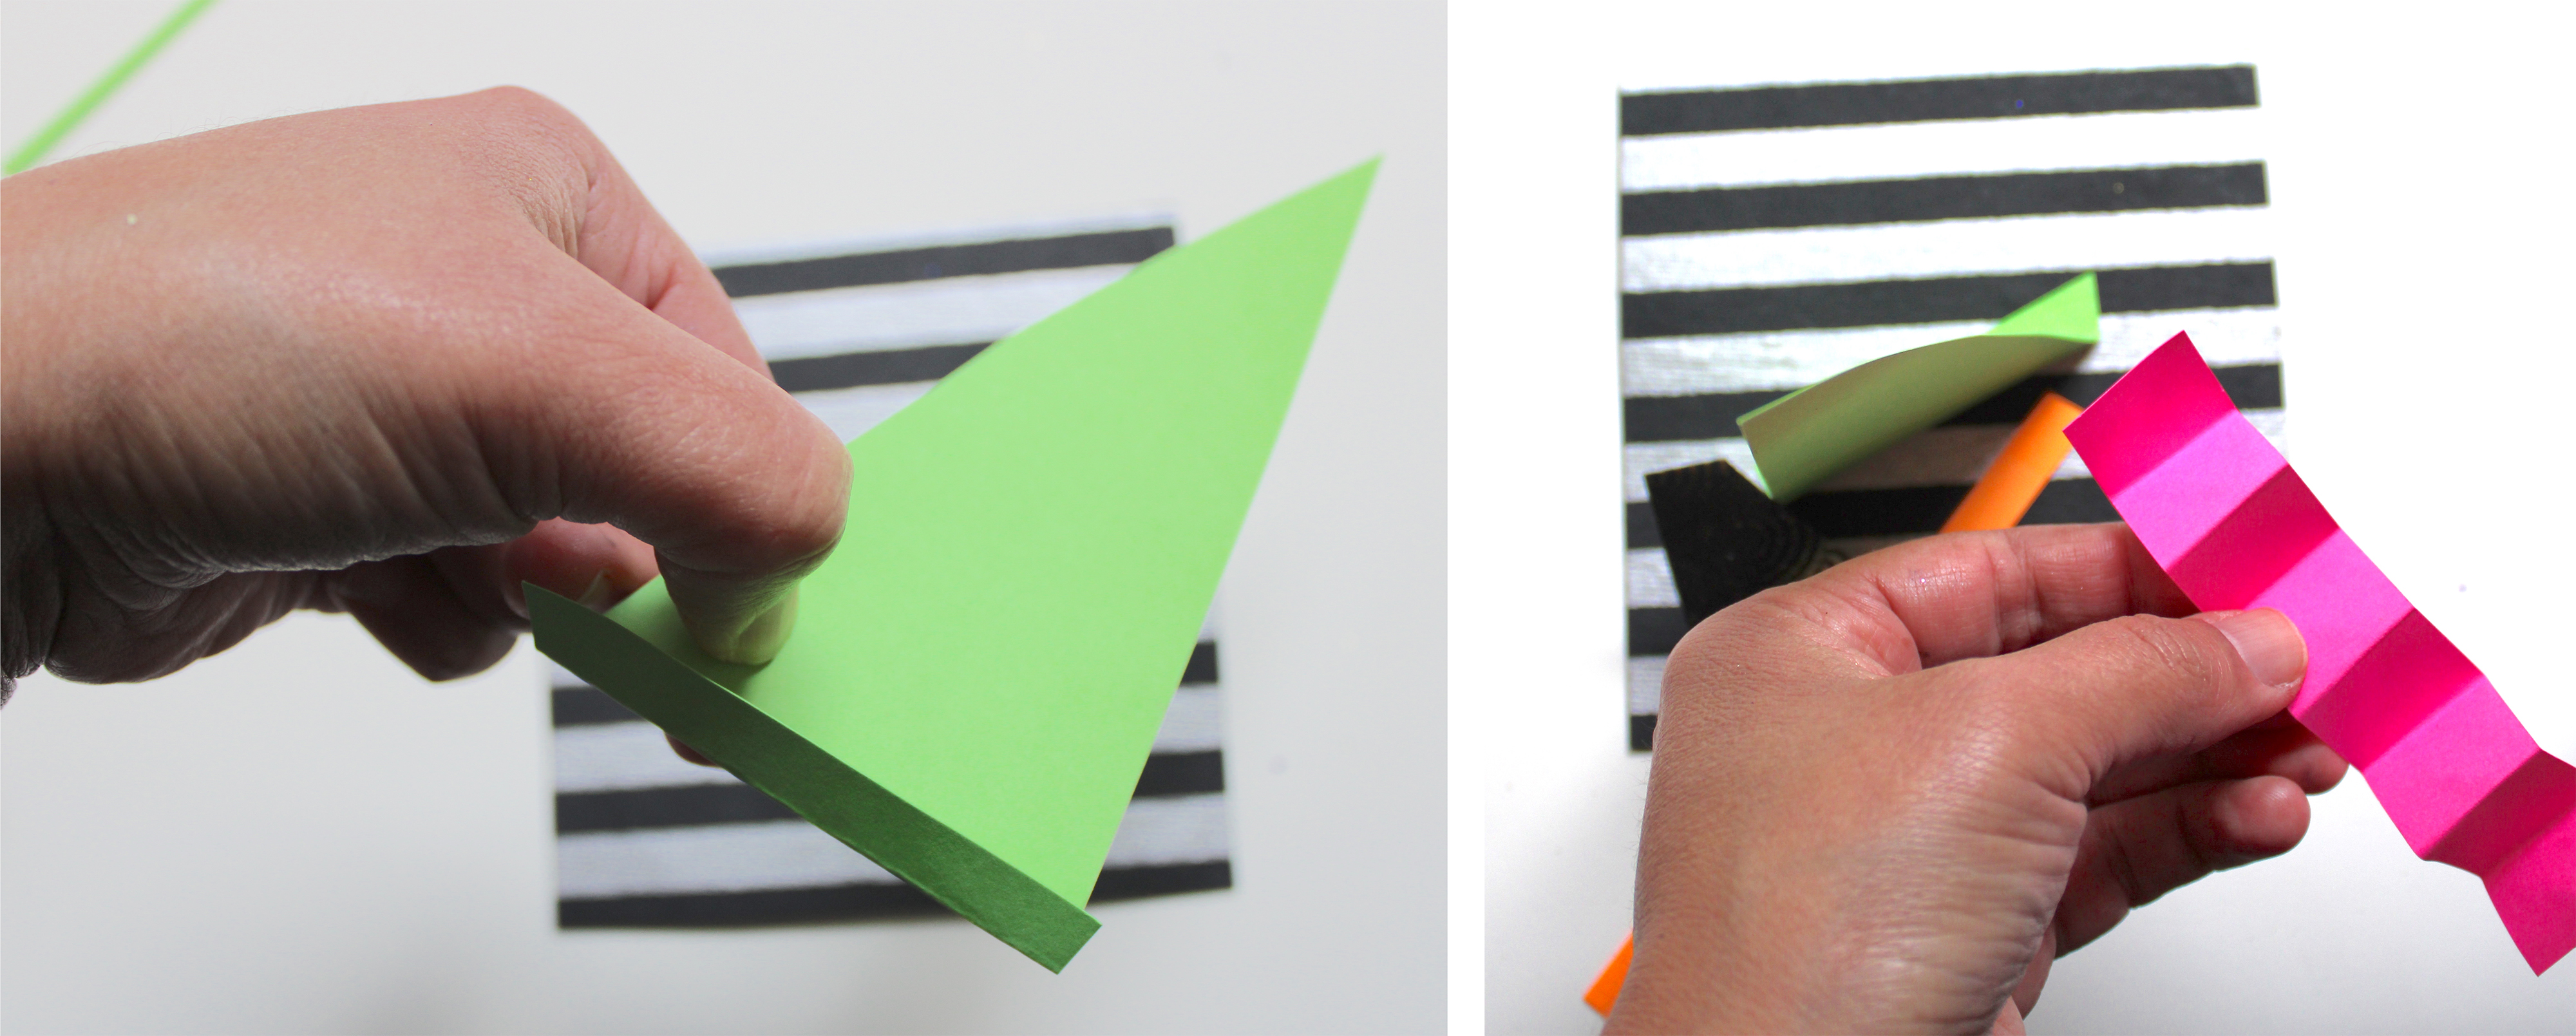
Shape the papers by creating tassels, bending, curling, folding, looping, or spiraling. Set them to one side.
Step 5
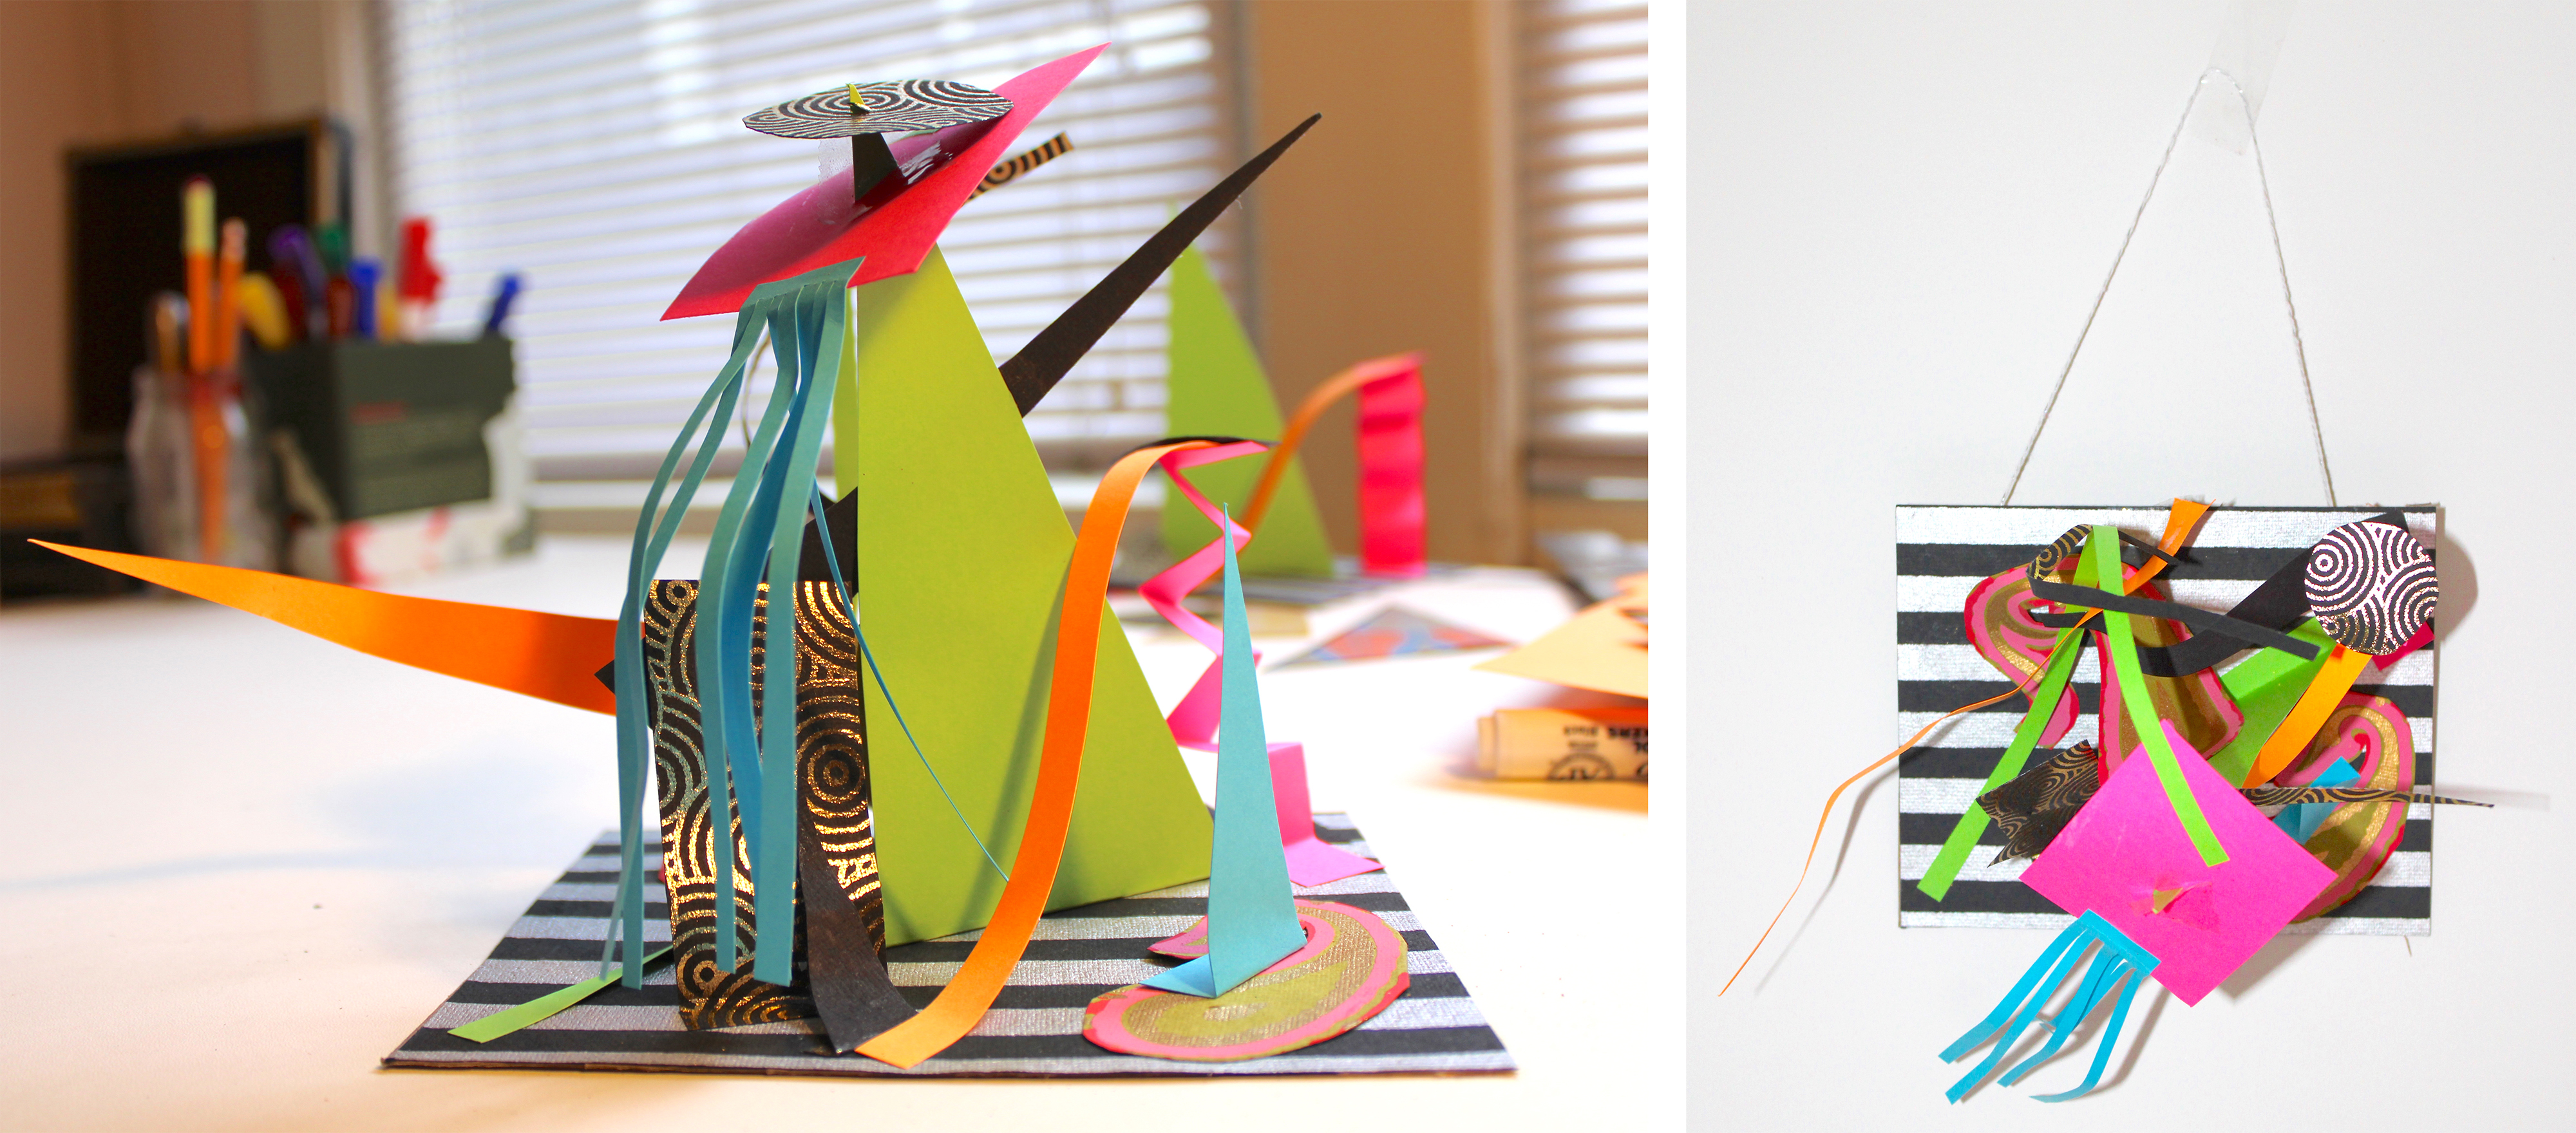
Measure and cut a 5” x 5” square using one of the cardboard boxes. Cover the square with one of the patterned papers, and before you move on to the next step, decide if you want your sculpture to sit flat on the cardboard base, or hang on the wall like Frank Stella’s example. To do option #2, add an 8” piece of string or yarn to the back of the cardboard base and secure each side with tape.

Step 6
Fold the bottom of the shapes that you are attaching to the base and add glue. Overlap, collage, or intersect them in a variety of ways and use glue or tape to attach them to each other. The idea is to create dynamic negative and positive spaces, heights, and volumes. The possibilities are endless!

Step 7
To add shapes that appear to be floating, make a small diagonal slit on a shape that is already attached, and insert the second shape into the slit. You can tape these together to add more support.

Inspire other young artists at home by asking an adult to share your creative three-dimensional composition on their social media and tag @lacma. I invite you to learn more about the different types of sculptures that artists have created over the years by viewing the works in our permanent collection.


